In this series, we explored the art of drawing, doodling, illustration, cartooning - pretty much putting pencil to paper and playing with the outcomes.
I started the class with reminding students that we already know how to draw. Any one you see out there, drawing something, is drawing what they know. Not every illustrator can draw every thing. I can draw dog heads until the sun goes down... but draw the body? no way! same goes for lots of stuff. I can draw a face straight-on, but try and get a three quarter view, I can not do it! That does not mean that I couldn't learn through observation, practice and critique from others.
So we started at the basic beginnings. I created some mini lessons from my experience and from this book:
Drawing Lab by Carla Sonheim
I just love it.
First we drew a circle and discussed how to make it look three dimensional. We talked about choosing a light source direction and about leaving a sliver of white on the darkest side to give it that extra 3-d effect.... the reflection of the surface back onto the object!
Using cross hatching and bands of shading, adding a shadow, thickening lines, etc.
Then we took a lesson from the Drawing Lab book and drew random blobs and made them into creatures
We talked about three dimensional cubes, parallel lines and how to interpret a shape with certain rules that would always be the same. (Perspective without using the word "perspective")
We looked at scale - using the same object to define different sizes and settings
Then we took a common shape (the can of food), and by changing its scale and form slightly, we derived numerous other objects.
Once we had created a three dimensional vase or cup, (preparation for a face.... a can shape but more narrow on the bottom) we talked about cartoon ways of indicating features on a face, shortcuts that illustrate major shadow areas. Shadows are defined by plains that block the light source... the top lip has an overhang, the nose, the chin... etc. Using methods from earlier in the evening, we worked on these features. Noses, ears, eyes, lips... all very easy to apply with a few strokes
We combined them into a face, using the "draw the second eye with the paper upside down" method to double fake-out the brain which is trying to make the second eye symmetrical with the first but always puts it too high or too low because it sees a "Face", not a composition. Really! It's true and the trick works!
I apologize for the disparate levels of photo quality here... some images are scanned on a flatbed and some were taken in evening light indoors... bah!
We then did another project from the Drawing Lab book and made our own Modigliani - style faces:
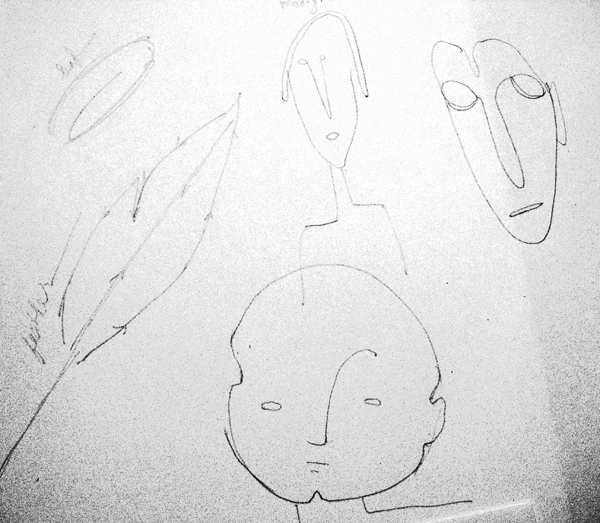
Next, we did some quick lessons on single point perspective, drew simple leaves and feathers and one easy heart shaped bird image trick.
Look at all these sketches - aren't my students fabulous??! ANYONE can draw, and.... anyone can draw well!

This was probably the most exciting Tending to the Pilot Light I have ever taught. Being able to organize my drawing, doodling, illustration, sketching experiences, to share all these tips and tricks and see the light go on in people's eyes was just fantastic.
I played some more with the faces....
click to enlarge
I look forward to creating with you soon!


