Showing posts with label christmas. Show all posts

12.31.2011

November Dress-up: Classical or Neo Classical - submission

Alas... late again! I had grand plans back in November... I even went out and purchased Jane Austen's Pride and Prejudice just for this project.  Here it is the last day of the year and I'm playing catch-up on several months of this Dress-Up 2011 challenge.  I suspect that it's a metaphor for life in general, eh?

Anyway.. I'll show you the dress in a series of process pictures below. I made it last night while my daughter read from the new Christopher Paolini book "Inheritance".  There is nothing so lovely as working out design challenges, converting ideas of flowing fabric into three dimensional shape with the limitations of paper while your favorite person in the world reads enthusiastically (with voices) from this long awaited final book in the Eragon series.

The process started with what I thought would be a fantastic color choice - dying the pages in coffee.

Here's a tip... separate the pages from the spine glue BEFORE getting them wet!


They look great.. nice and brown, all laid out on the counter.


I put a non-dyed page on top to admire the color contrast.

Then.... they dried....

and

I had nice crinkly pages from Pride and Prejudice, but hardly any color.  'Suppose I could have done a little research into natural dyeing, but as with most projects, I just sort of jump in and hope for the best.

Yesterday, while waiting interminably for my most favorite person in the world to spend her gift certificate at a clothing store (teenage daughter + clothes shopping = timestandstill), I worked on sketches from ... yes, you guessed it, my historical fashion bible, John Peacock's Costume History 1600'a-1990s. I wanted to familiarize myself with the main elements that make a dress LOOK like a Jane Austen Era costume and not just make a dress based on one of his drawings. So, as the dressing room area chairs were thankfully comfortable, I studied his drawings and made some rough ones of my own.
Then it was time to construct the actual piece.  I debated about whether to make a plan and sketch out EXACTLY how I was going to create the dress and ended up just beginning by attaching pages together to make some "fabric".  I then worked on the decorative elements in the lower half of the skirts.  Having applied an accordion style detail at the correct height of the skirt, I realized that the hem below it was flat and un interesting... so cut off the skirt under the decorative element and made a new "hem" with a severe box pleat.  I colored all the insides of the pleat with a maroon pencil to give more depth.

Hopefully, you can see what I'm describing in the picture above.

I worked on the skirt first, as a flat piece.. then made tiny pleats all around and when I attached the edges, it stood on its own. Then I cut out the front of the bodice with darts and after a few tries, cut out a matching back piece. Tip: fold paper in half to get matching curves and angles!

Then... I started on the sleeves... I tried several prototypes - cutting circles with curvy darts, triangles fitted together...etc.

Here are a series of pictures my daughter took of my hands while I tried to sort out how to create a poufy sleeve cap...


First, I made a narrow accordion strip
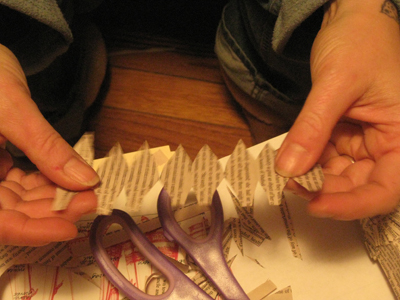


and then cut it in an approximation of the sleeve shape, trying to visualize the bell shape broken into even segments,


and fitted it in a sleeve cuff lined with double sided sticky on the inside.
To make the sleeve fall from the shoulder (instead of stick straight out) I cut the "petals" down significantly on the underside of the sleeve.

I coated a small strip of paper on both sides with double sided sticky to give a surface to attach all the tiny tips around the arm hole.

Tip: to make matching sleeves, don't get so excited that you complete construct the first one and attach it to the garment BEFORE cutting a second sleeve.

When I attached the two components together.. I was actually amazed. One never knows how these things will turn out. I added decorative "lace" by cutting curved bits from the white page borders and used that contrast on the waistband as well.

Here is the final piece.


I put it on top of one of these fantastic hot chocolate bowls we received from my sister for christmas... in addition to the reading, and photography, my daughter made us fabu hot chocolate to energize us throughout the evening.


Here is a detail of the assembled sleeve in place with "lace"


Although I did not plan which pages to use or what text to feature, it is fun to see familiar names all over the dress.


Here is a full front view and...


a back view... and ...


a detail of the ribbons.

This may be one of my favorite pieces I have ever made!

Happy last day of 2011.

Liza


12.30.2011

Tending to the Pilot Light: More Plushies!

Last week was (king) soopers busy! in addition to the Thrifty Gifter Yarn Wrapped Wreaths workshop held on Tuesday and Thursday evenings, I squeezed in one last TTTPL session on Wednesday night.  We made some really cute little pieces and since it is post-Christmas morning, I can show pictures of the pieces my daughter made for cousins and family as well as the crazy stuff I made for her!


Here's a handmade pattern being cut out to make a cute little unicorn!

Here is the unicorn with all its fringe and pipe cleaner horn and a sweet contrasting blanket stitch around the edges.


This cute Kitty Toy has a jingle bell hidden inside!

Here are the amazing little big-eared creatures my daughter made for family member's stockings... each with its own character.


Here is the GIANT plushie chibi-head doll I made my daughter... tape dispenser shows scale.  It has a wire frame inside and a cute little crochet dress and scarf


Here's a closeup of the eye... I used these Teddy bear eyes I had bought on speculation once while trying to beef up a craft supplies order without bumping up the shipping expense. 
I got the idea for overlapping fleece eyelids from these amazing creatures at the Wonderfair Gallery.

Here's the plushie breakfast plate special I made for my daughter's stocking...can you see the butter melting?!

All in all, I am totally mad for plushies! I even saw a couple of books dedicated to them in the library in my favorite stacks...the 730's to 750's... I could just live back there!

I hope you all had a lovely holiday vacation and am looking forward to lots of creativity in the new year!

Check back often on my new "page" on this blog as I'm going to post a dress-a-day for 2012.

Also, I am bound and determined to finish the year of dresses for the Dress-up Challenge and have just one left to do.  I am not sure why everyone dropped out soon after I took up the hosting of the challenge, but, just for my own sense of accomplishment, I'll make one more post tomorrow with the last two challenge submissions to make an even 12 dresses for the year.  If anyone has any feedback or knows why this project petered out... please leave me a comment below.

Cheers, I'm off to catch some of Lawrence's Final Friday Artwalk tonight - see you there?
Liza

Yarn Wrapped Wreaths at the Lawrence Public Library

On December 20th and 22nd, the Lawrence Public Library had its last session of the brand new Thrifty Gifter Series... Yarn Wrapped Wreaths!  We had about 20 people each evening and everyone went home with a beautiful handmade one-of-a-kind wreath.  Thanks goes out to my incredibly helpful assistants Sarah and William... I truly could not have taught the class without all their help setting up, demonstrating methods, answering questions and all the breakdown and cleanup!

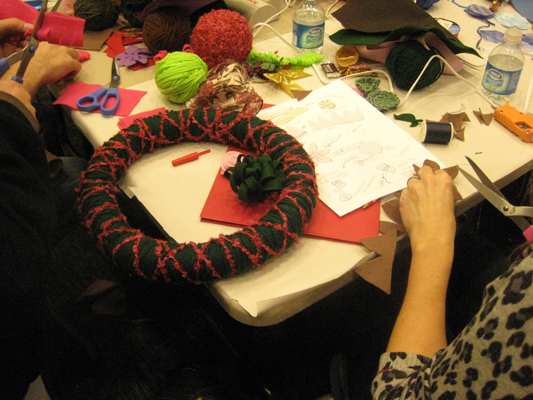
I started the class with an explanation of the project and demonstration of a few types of felt flower styles.  I showed the participants the most efficient way to wrap their wreaths (hold wreath between knees and circulate ball of yarn 4 or 4 times before sliding strands together), and reminded them that the process was split into two sections... the more meditative, mindful section where they could practice patience and get to know their neighbors, and the second section which would be much more active and stimulating with all the decorations to choose from.

To aid with the instruction, I quickly doodled a step by step process page and color coordinated our felt samples to the colors on the page:


Sarah and William folded and rolled the pieces along with me at strategic positions along the table to give participants a closer view of how we were manipulating the felt.

Here is what the place looked like just as people started to arrive on Tuesday evening:


Thanks to Stepping Stones Ranch for all this great yarn!! My daughter's horseback riding teacher was having a fabulous garage sale and we scooped these up for the Library.

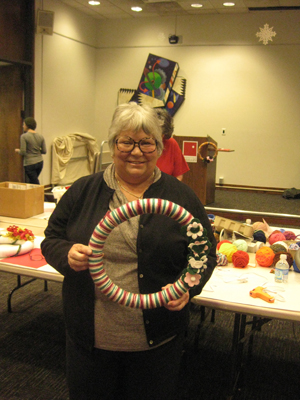
The following pictures are a mix of both evenings with process first and happy finished products at the end.


I was amazed to see how many different styles and interpretations people created...! We had a broad spectrum of ages and even a healthy sprinkling of menfolk... The time went quickly, however almost everyone completed or nearly completed their project.

This was so much fun I loved teaching such a large group of people and am so glad the Library was able to create this fabulous series of creative sessions... If you enjoyed the Thrifty Gifter Series, be sure to let the Lawrence Public Library know your opinion... maybe we can make a Lawrence Holiday Tradition!

Thanks to all the great participants, Sarah and William, and of course to Rachel who organized the entire event!

Happy New Year!

xxoo
Liza


Related Posts Plugin for WordPress, Blogger...